Dynamics 365
Customer Change Approvals in Dynamics 365 Finance and Operations
Sometimes organisations may need approval process upon changes to the existing customer master data such as Name, Bank account etc. D365 F&O has introduced a new workflow approval feature named as Proposed customer change workflow to accomplish this requirement.
Using this feature, one can configure the approval mechanism to have a better control on updates to the specific business critical customer master data fields. This feature enables the change request to be approved before the changes get committed to the customer master record.
Parameters Setup
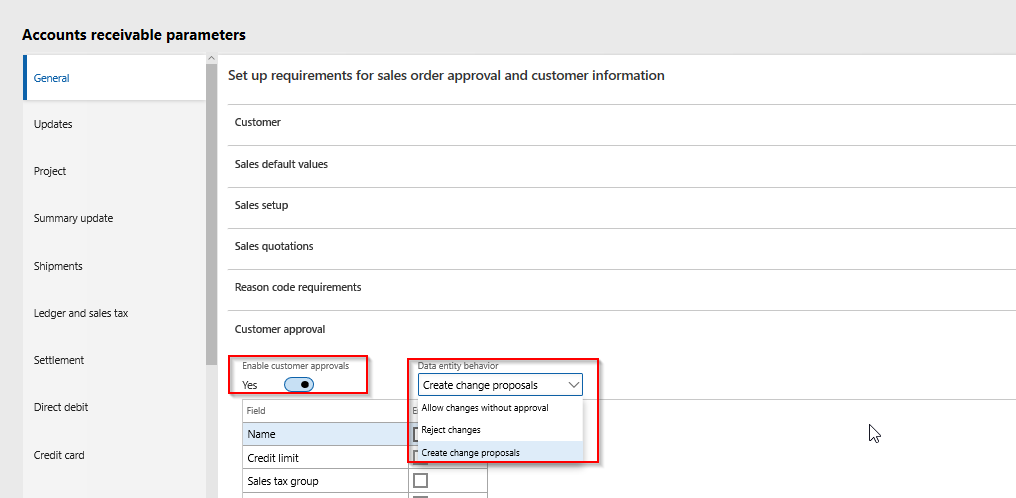
Below are the parameters that are required to enable this feature. Mark the Enable customer approvals check box under Accounts receivable > Setup > Accounts receivable parameters > General (Tab) > Customer approval (Tab), as shown below.
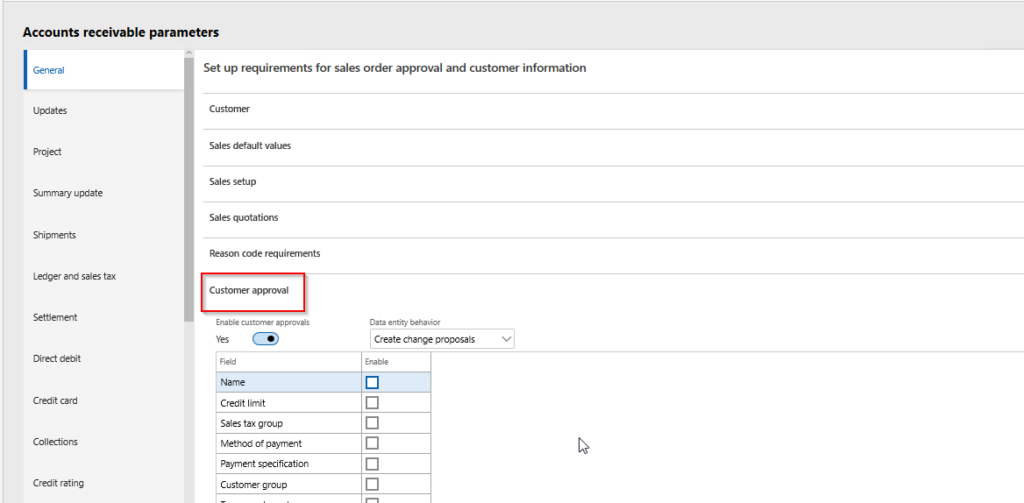
Set the Data entity behaviour value under Accounts receivable > Setup > Account receivable parameters > General (Tab) > Customer approval (Tab), from one of the 3 available lookup options, as appropriate, to control the data import behaviour through data entities.
- Allow changes without approval – Customer record can be updated without approval.
- Reject changes – Changes cannot be made to customer record.
- Create change proposals – Changes to the fields will be treated as proposed changes and subject to required approvals.
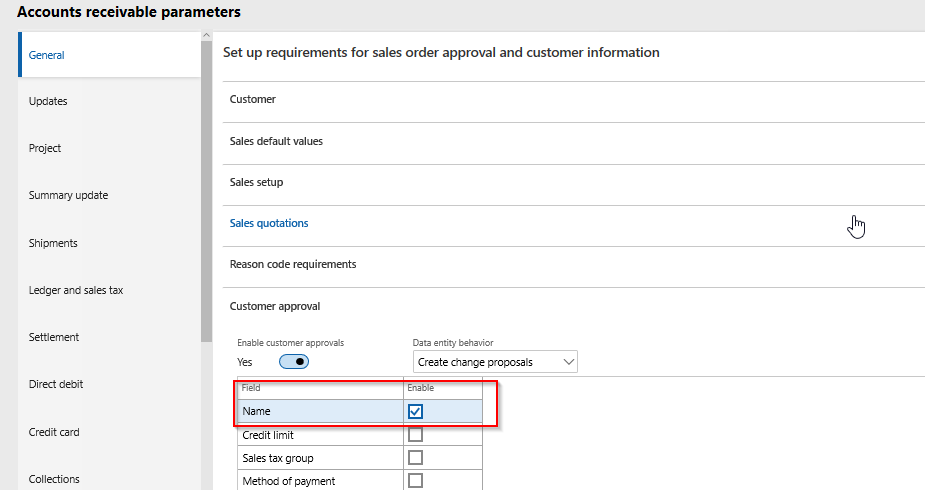
Enable the business critical fields by marking the Enable check box against each field that needs approval, under Accounts receivable > Setup > Account receivable parameters > General (Tab) > Customer approval (Tab), as shown below. In this example, Customer Name field is enabled to illustrate the process.
Workflow Configuration
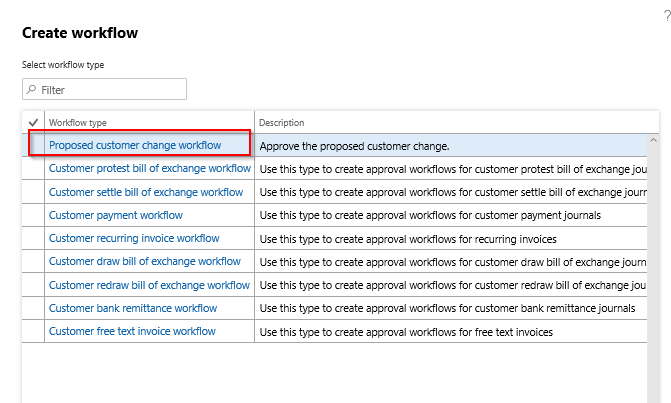
Configure a new workflow by selecting the wotkflow type named Proposed customer change workflow under Accounts receivable > Setup > Accounts receivable workflows, as shown below and setup the workflow as per business need.
Update Customer Data
Once the workflow is configured, try updating the name of the existing customer from Accounts receivable > Customers > All customers > Edit.
Notice that in the customer record, Name field label will be suffixed with (Requires approval) text indicating that this field requires approval when updated.
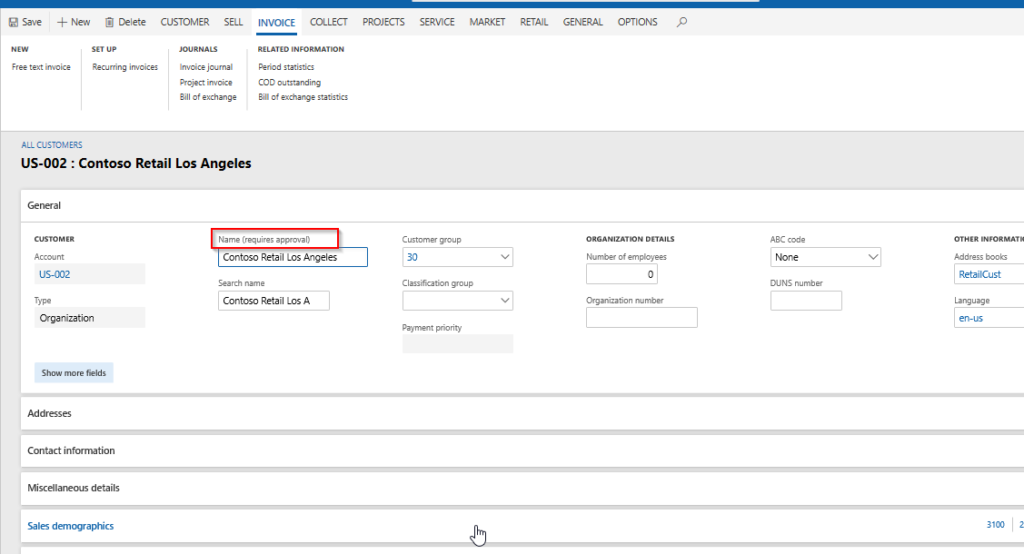
Change the customer name and observe that system will pop up a dialog by showing the current and proposed customer name, for your review and one can discard the change if required.
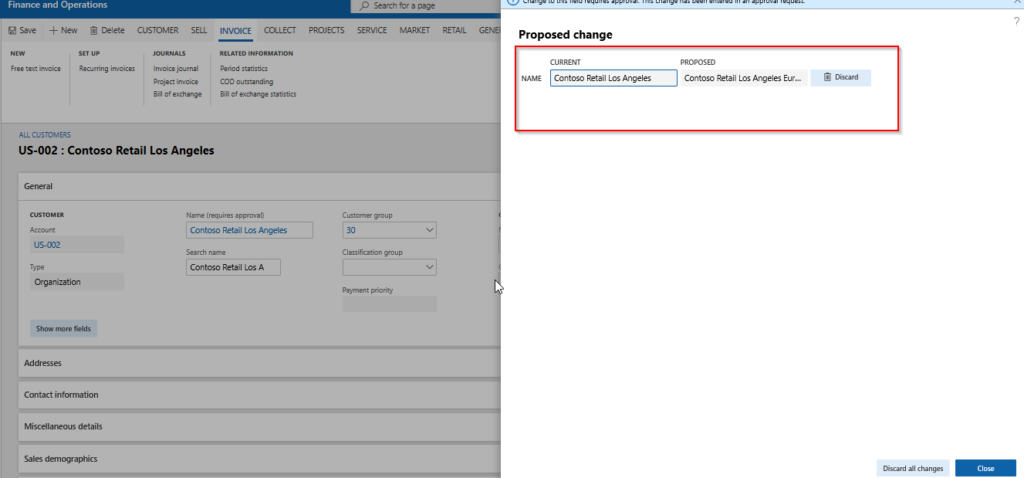
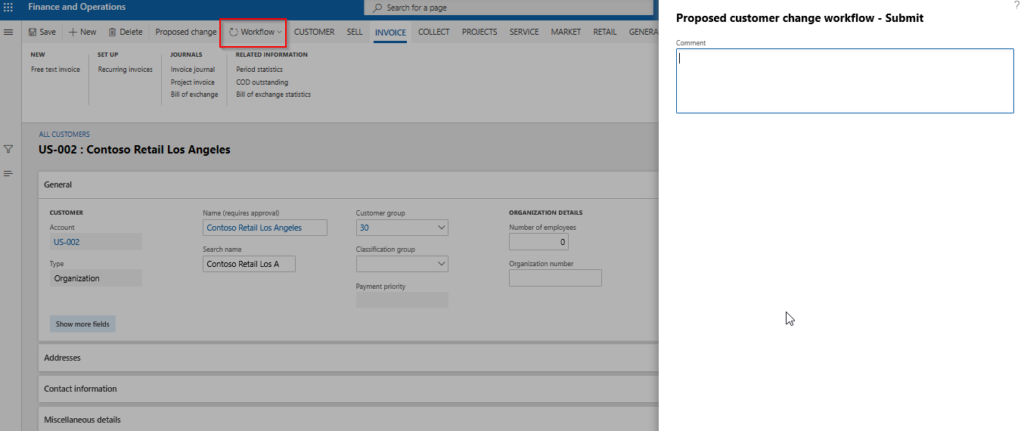
Close the Proposed change dialog and submit the change to workflow.
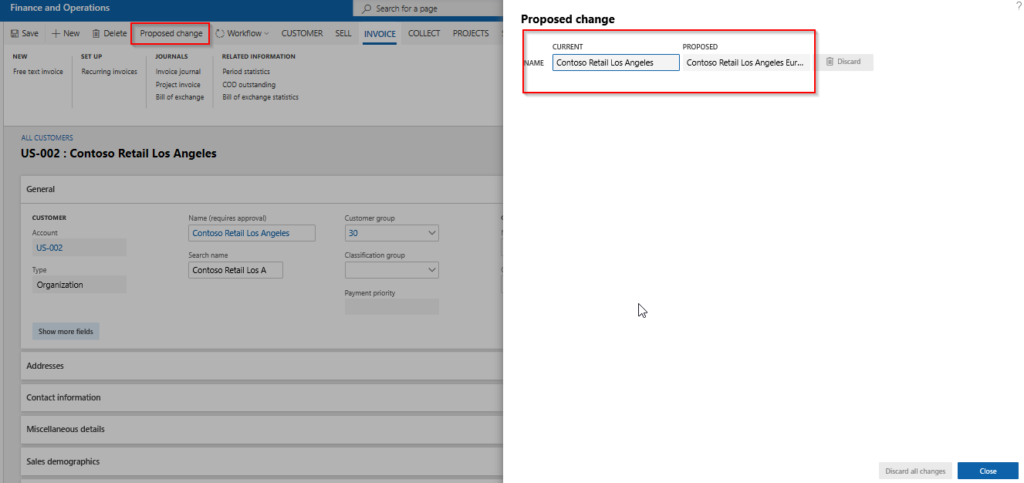
Approver can click on the Proposed change button on the customer master record, to view the proposed changes in the customer data before taking an appropriate action.
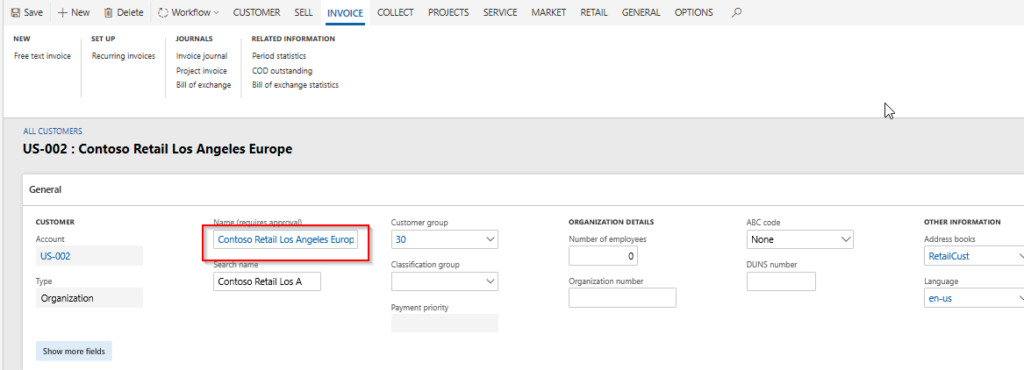
Once the workflow approval request completes, system then updates the customer name in the customer master with the proposed field value.
This concludes the illustration of Customer change approvals feature.
Dynamics 365
How to create a custom table/data source for use in Ledger Financial dimensions in Dynamics 365 for Finance and Operations
One of our Dynamics 365 experts shares his experience and ideas on how to create a new custom data entity/form and then enable it for use as a Ledger Financial dimension. The financial dimensions framework of the standard Dynamics 365 For Finance and Operations app is pretty robust and allows you to configure as many financial dimensions as you require, using values from various out of the box entities such as Customers, vendors, employees, products, Prospects and more. However, there are often situations where you customize Dynamics 365 for Finance and Operations to add new custom data entities/tables to address specific needs of your business. In those cases, you may want to use these custom entities as one of the financial dimension, to be able to do appropriate financial reporting.
This post gives you the detailed insights about how to go about this.
Below is the list of AOT objects that are required to create a new custom financial dimension in D365 For Operations.
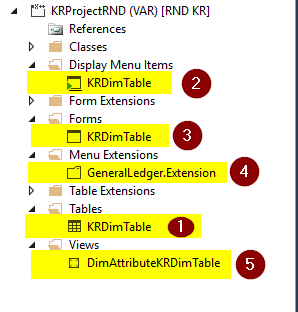
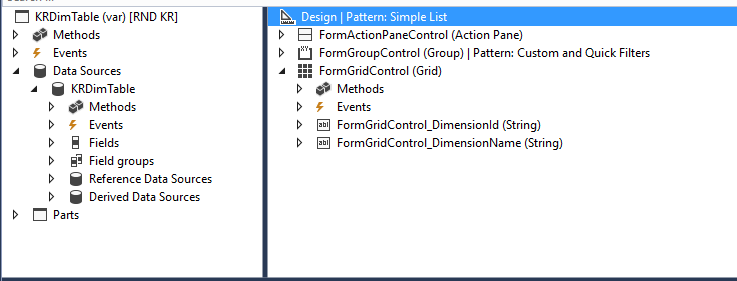
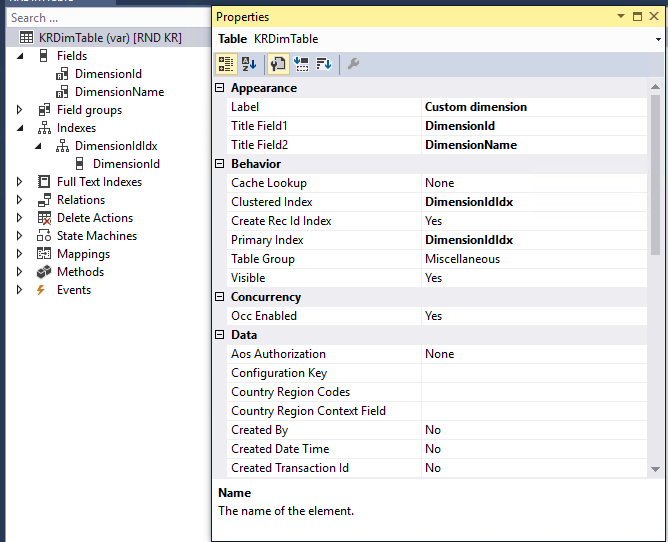
Table – KRDimTable
This is the table that I have created to be considered as master data that need to be used as one of the financial dimensions. This is as good as standard master tables like “CustGroup”. Minimum 2 fields are required.
o DimensionId
o DimensionName
Below is the screenshot of the Visual Studio representation of the table for your reference.
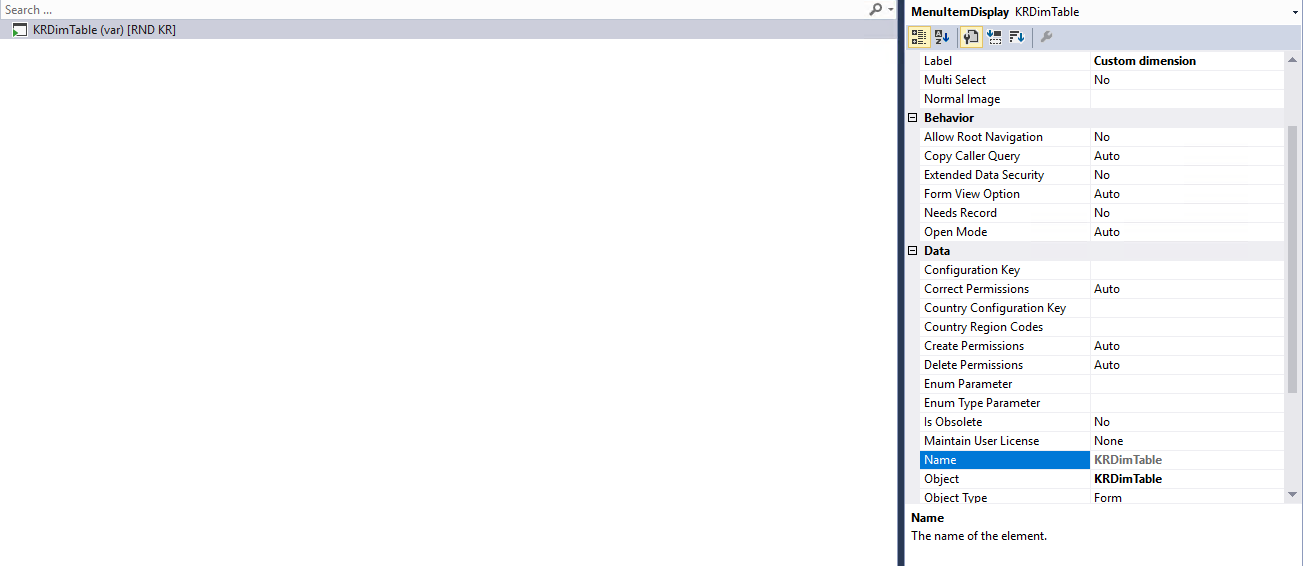
Form – KRDimTable
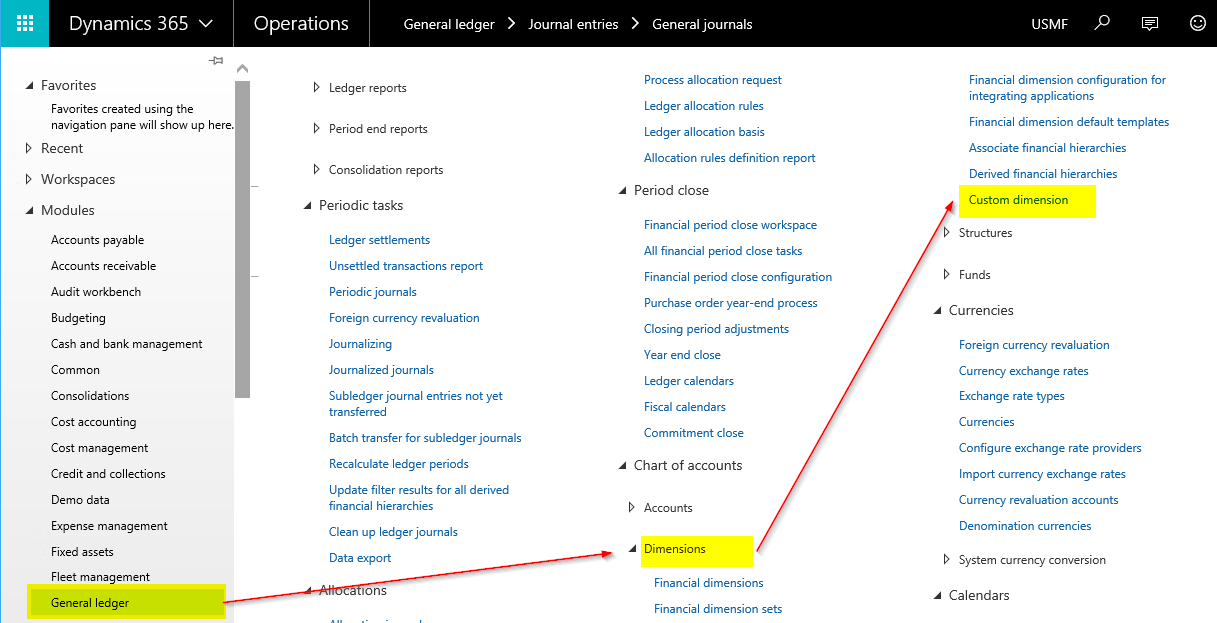
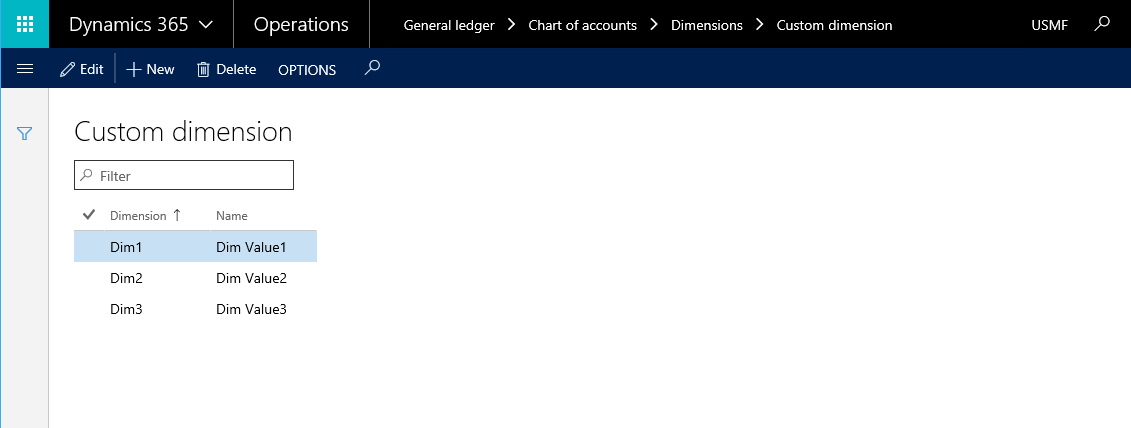
This is the form that I have created to open the “Custom dimension” form from the client and to key in the data to be used as dimension values. This is as good as other standard forms like “CustGroup”.
Below are the screenshots representing doth Visual Studio and Client representations for your reference.
Form
Display Menu Item
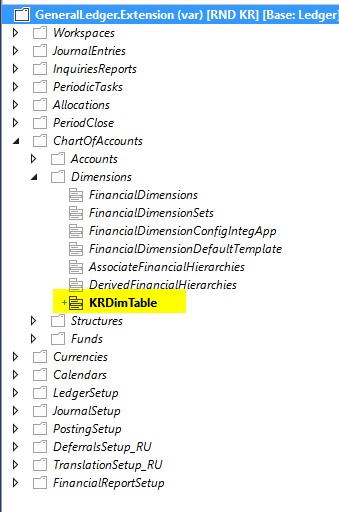
General Ledger Menu Extension
Client
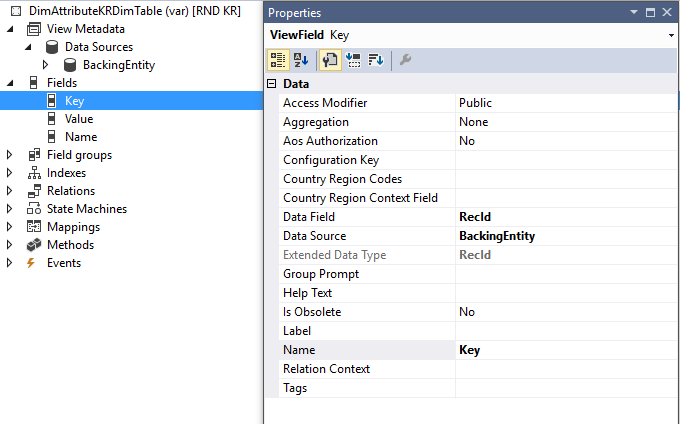
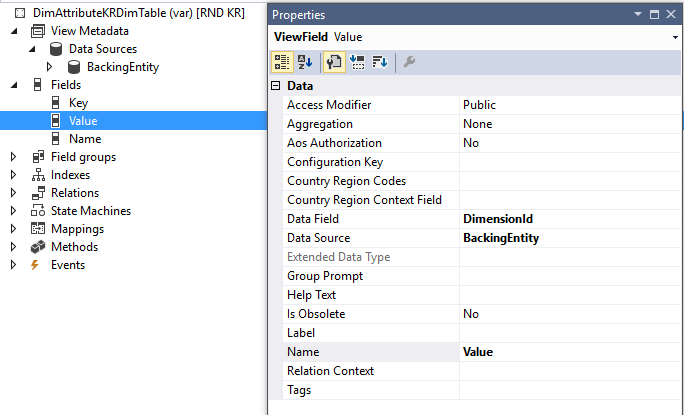
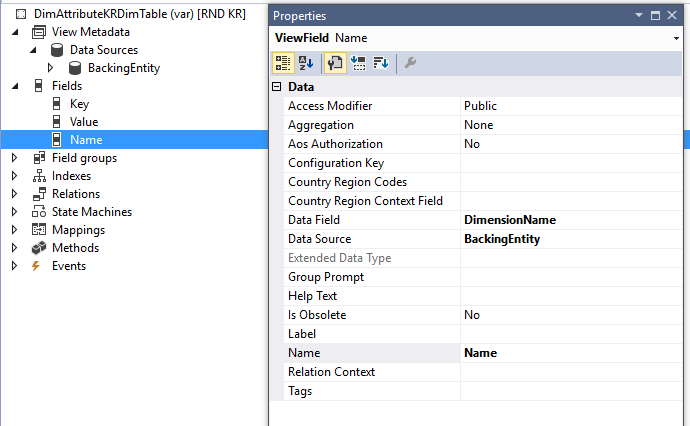
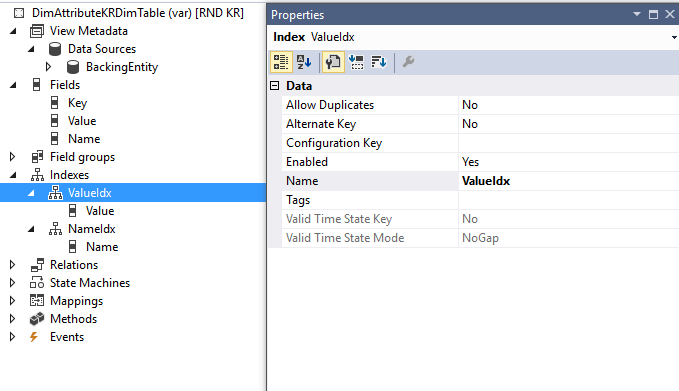
View – DimAttributeKRDimTable
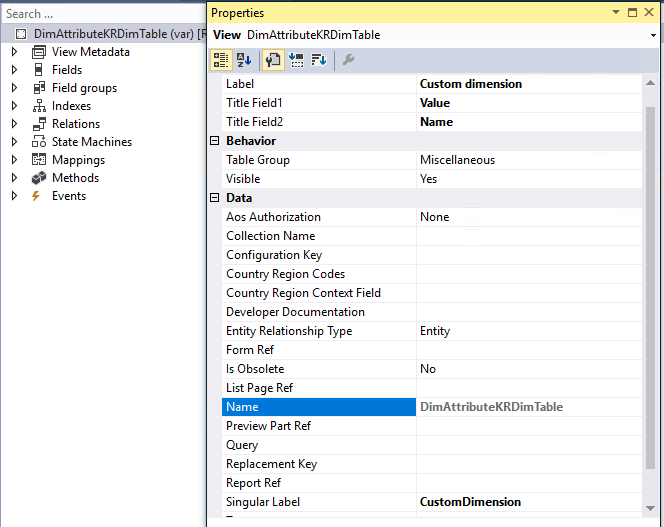
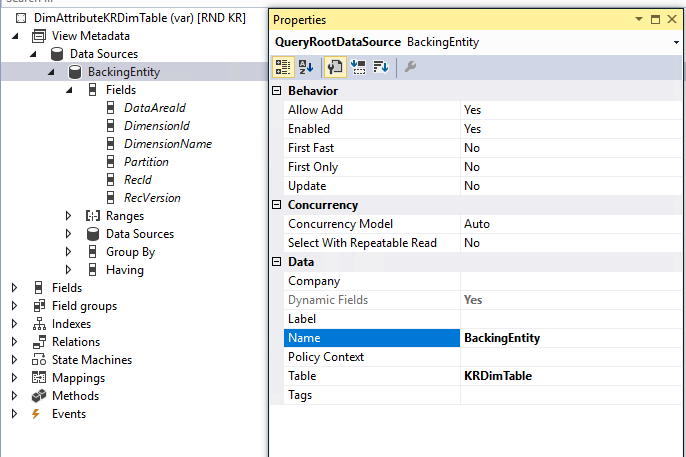
This view is most important object that enabled the “Custom dimension” as one of the financial dimensions.
- Data Source to be named as “BackingEntity”
- Singular label property to be set as appropriate.
- Three fields that are required are as below
o Key
o Value
o Name
- Indexes that are required are as below
o ValueIdx
o NameIdx
- Subscription methods that is required is as below
o registerDimenionEnabledTypeIdentifier()
Refer to the below screenshots for more details
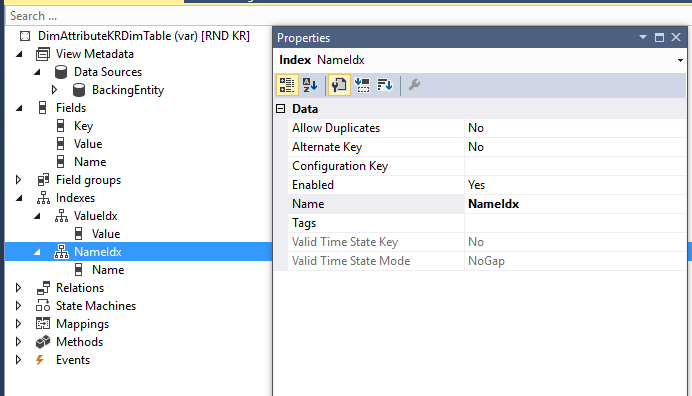
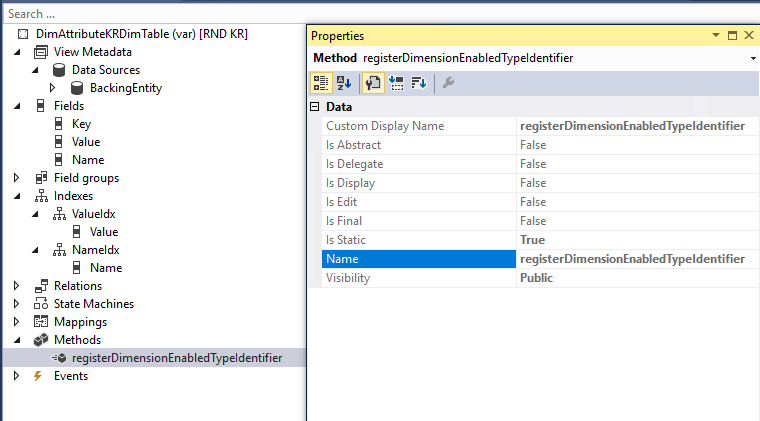

Form – Financial Dimension
After completing the above development, below is the output that one should see the below shown screenshots as the result.
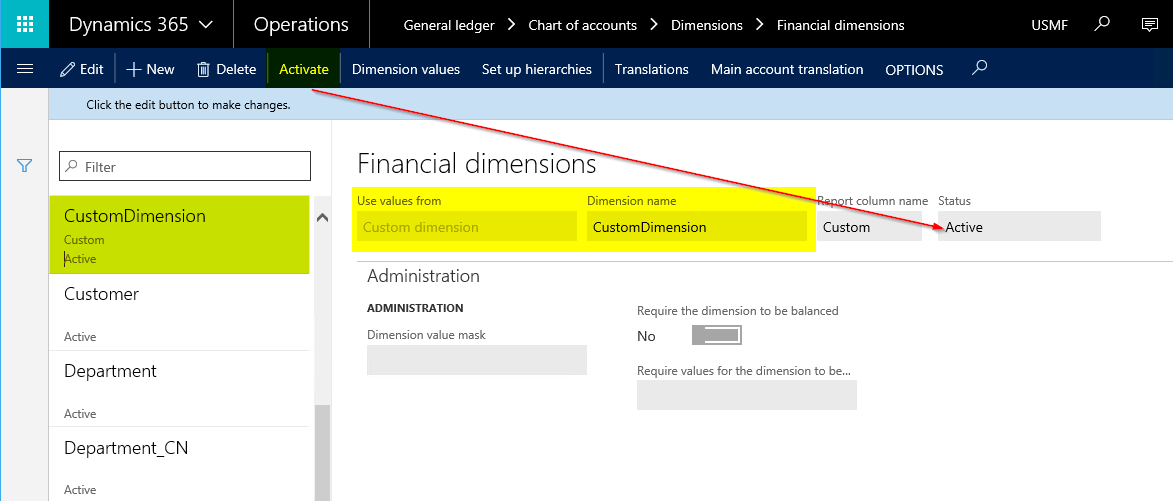
Open the Financial dimensions form.
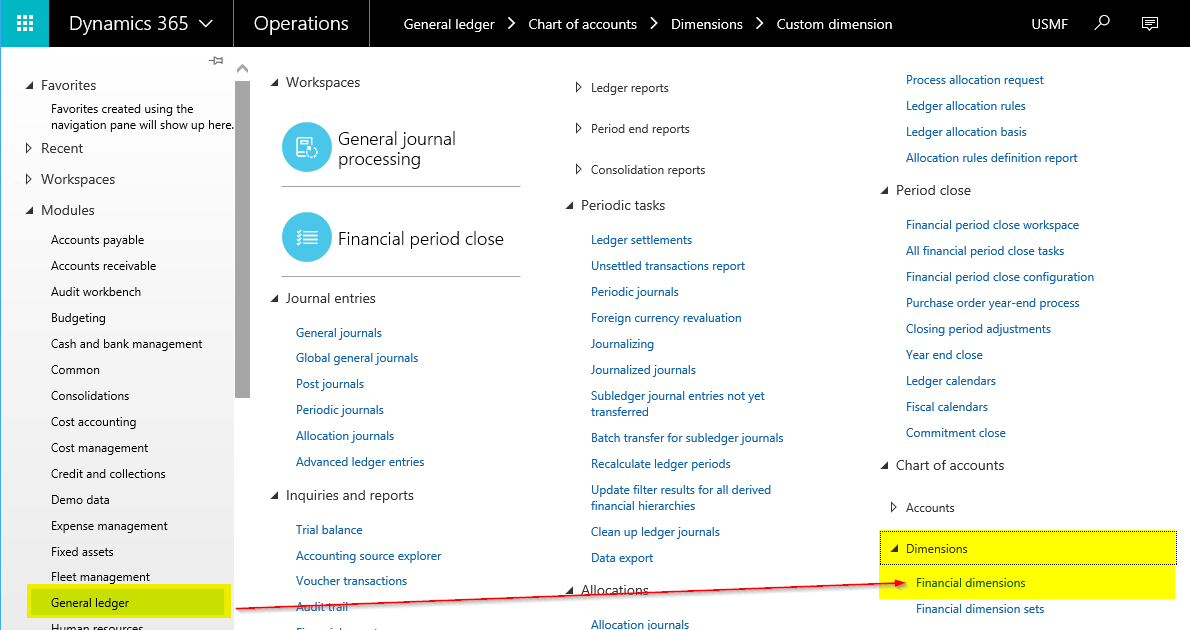
Create new financial dimension and select the newly added dimension from “Use values from” lookup.
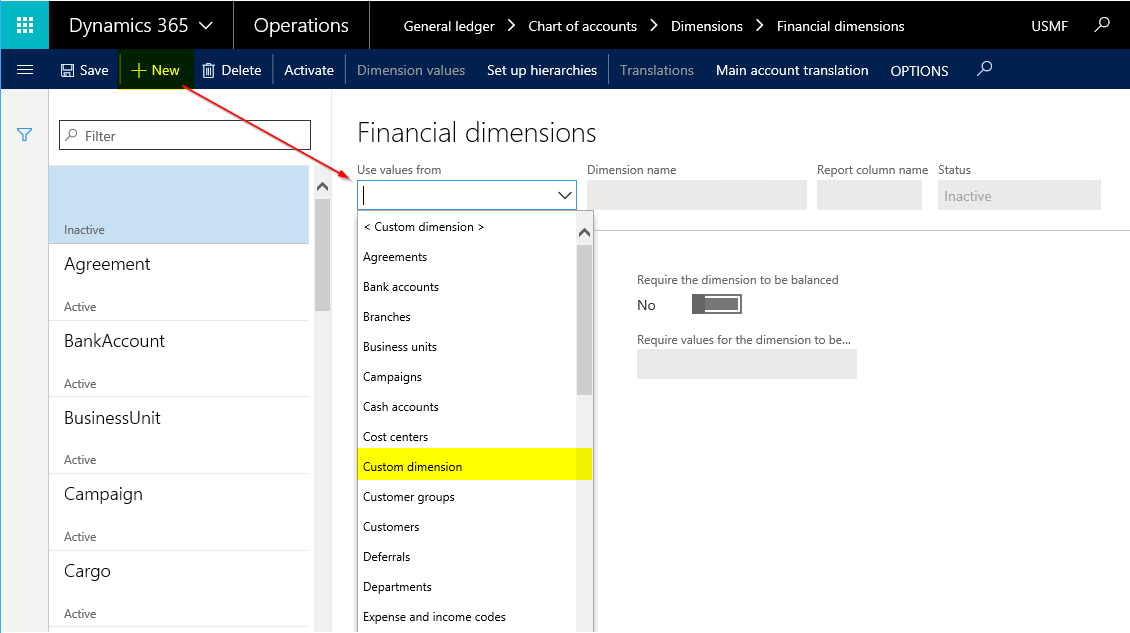
Save the record and activate the financial dimension.
Open the Configure account structures form.
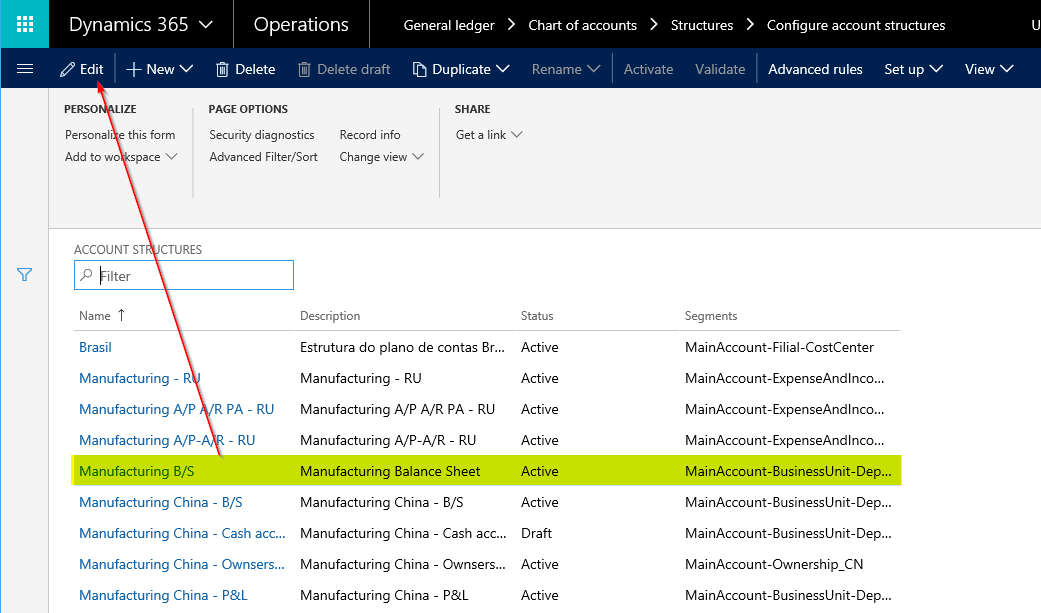
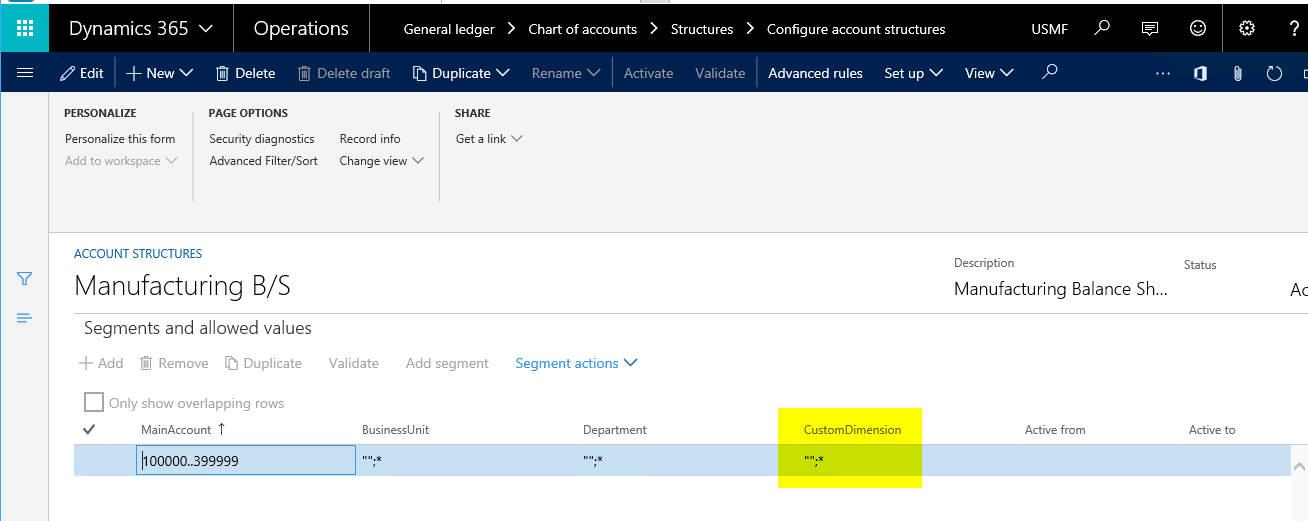
Edit the required account structure and set CustomDimension as one of the dimension and activate it.
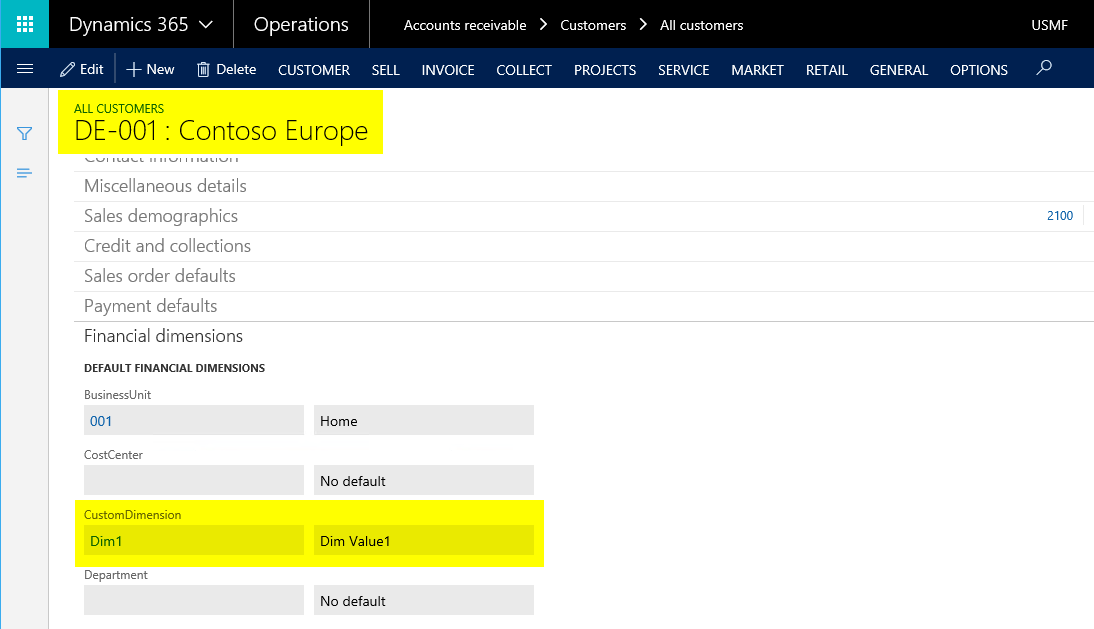
To validate the output, navigate to the customer master Financial dimensions tab page to see the newly added financial dimension.
To validate the output, navigate to any of the standard journal lines form to see the newly added financial dimension as a part of both default dimension and ledger dimension.
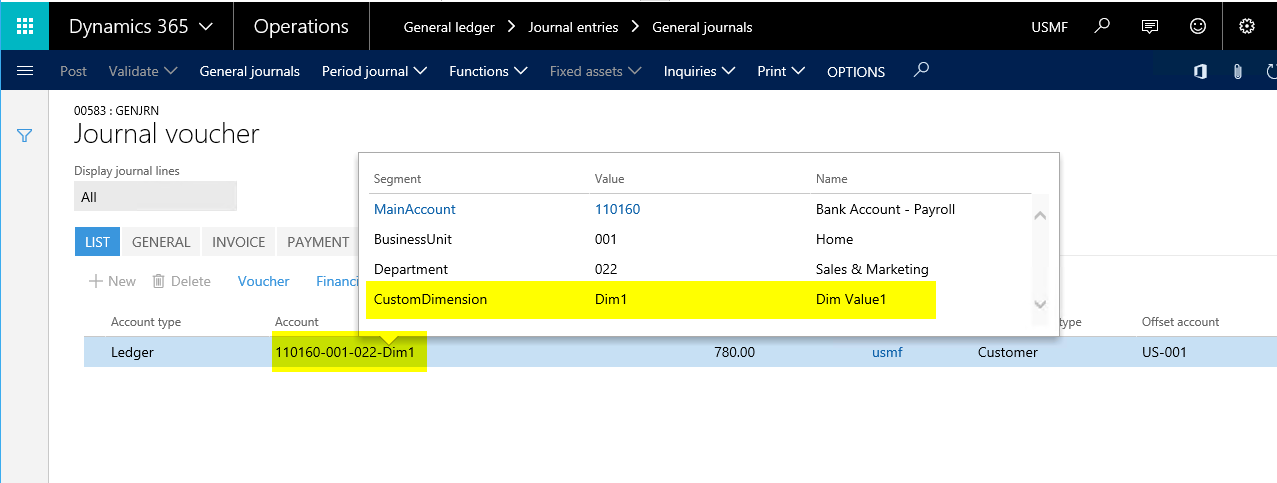
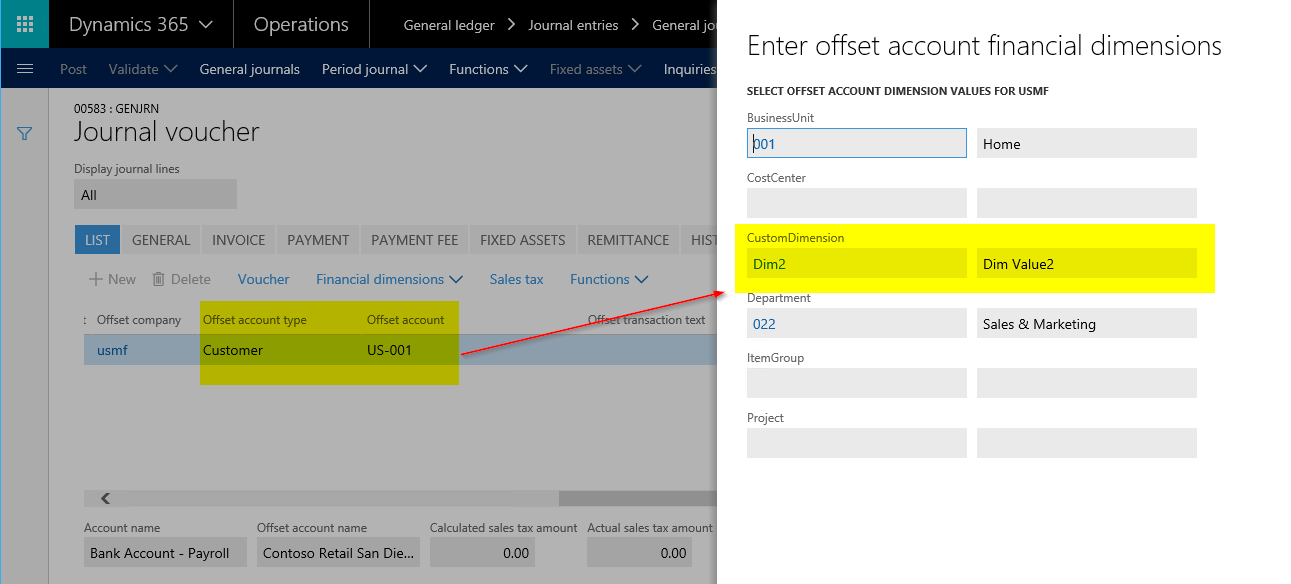
To validate the output, post any standard journal by setting the newly created financial dimension values and navigate to the voucher form to see the newly added financial dimension.
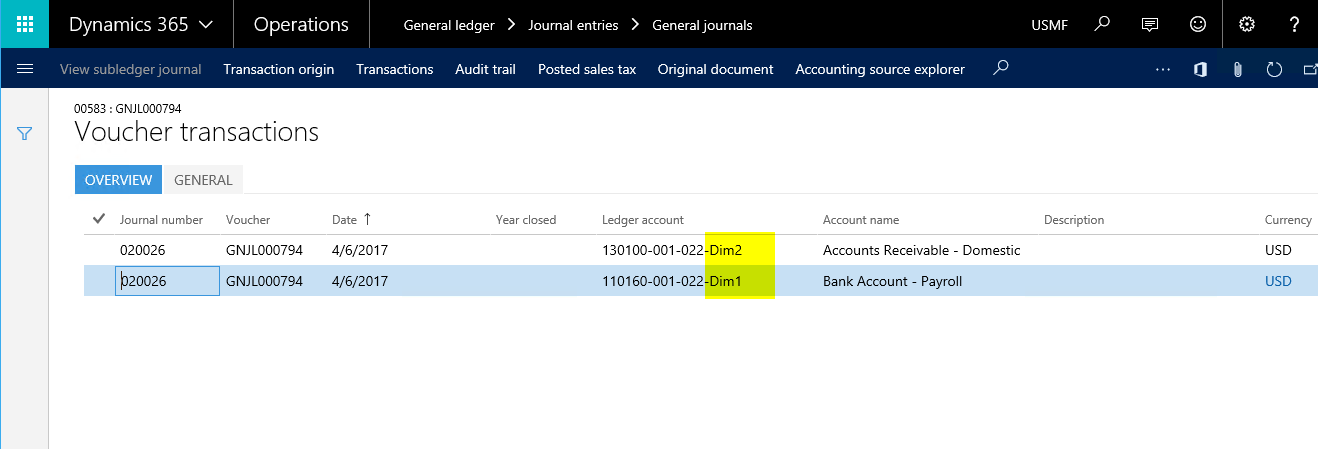
The concludes this post. Hope this post was helpful for you all.
If you need assistance with this or with anything related to Dynamics 365 or Dynamics AX Services and support, feel free to contact [email protected].
Regards,
Team Axpedite

